Showing posts with label Kimography Tips. Show all posts

Wednesday, September 7, 2011

RAW vs. JPEG, Dallas Fort Worth Wedding Photographer

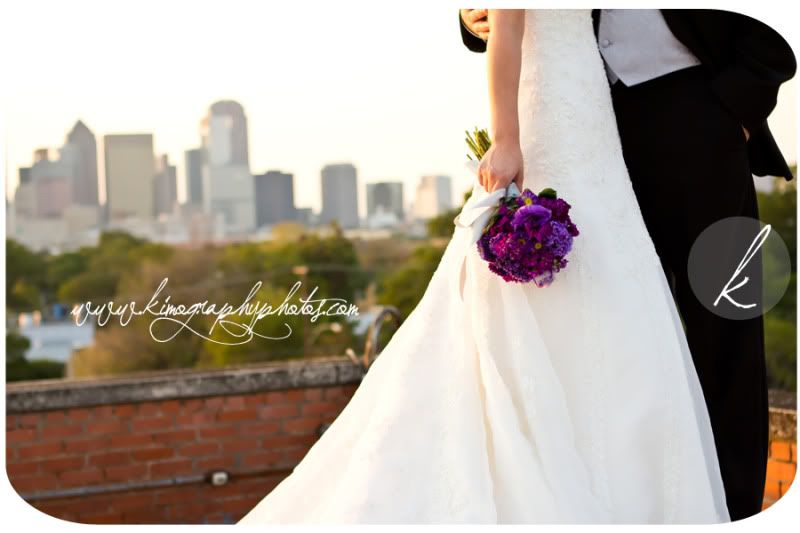
For fun here is a little sneak peak of a wedding I am still in the process of editing. This image, along with just about every image I take is taken in RAW form.

Photobucket
Photographers are faced with an important decision...to shoot in RAW vs. JPEG. RAW files can be compared to something that is raw or "uncooked." The camera does not manipulate the file in ANY way before saving it on the memory card. This raw digital negative can be edited to your heart's desire, until it is ready to be printed! Absolutely NO LOSS of quality occurs during the editing process. The ONLY drawback to this option is the massive file size of RAW files! These files are much much larger than JPEGs. The actual number of images you can take with your camera will depend on the camera you own (specifically its megapixels) and the size of your memory card. So if you plan to shoot in RAW, get a larger memory card or better yet, buy a few of them...and think about additional computer storage for your computer as well.

On the other hand, if shooting JPEG files, each image is being processed before it is saved on your memory card. Certain edits will take place within the camera, such as variations of contrast, sharpness, color saturation and these edit can NOT be UNDONE! The JPEG straight out of camera shot will look better than RAW straight out of camera due to this editing done within the camera...it is already slightly processed. This does not mean that the JPEG image file can not be edited any further, but any color or exposure settings applied when the image was captured...can not be changed. Any time a JPEG is edited and saved it loses quality because it is being compressed...something once again that can not be undone! Every compression will result in a loss of image quality , overall pixels and the maximum print size decreases, which is something you don't want...especially when running a photography business. The only benifit to shooting in JPEG will be the amount of pictures you can fit on ONE memory card...something I am willing to give up to get the RAW file editing power. :)

Thursday, October 14, 2010

Fine Art Edit

I have gotten a lot of questions lately about my workflow. I think this will vary from photographer to photographer but is still fun to know HOW people take and process pictures. I always shoot in manual mode...I like the control this gives me. I always shoot RAW files and auto WB. I try not to use my flash if humanly possible. I will try all sorts of tricks to avoid my flash! The flash flattens an image...takes important detail away from a persons face if pointed directly at them. I will use my flash for fill flash occasionally and IF needed. If you do see me using my flash I am usually boucing the light off of your wall. :)
After my photo shoot I will load all the images on to my computer. I will sort through pictures quickly rating all of my favorites. I do this a couple of times to make sure I don't miss any keepers. Then I begin the editing process.
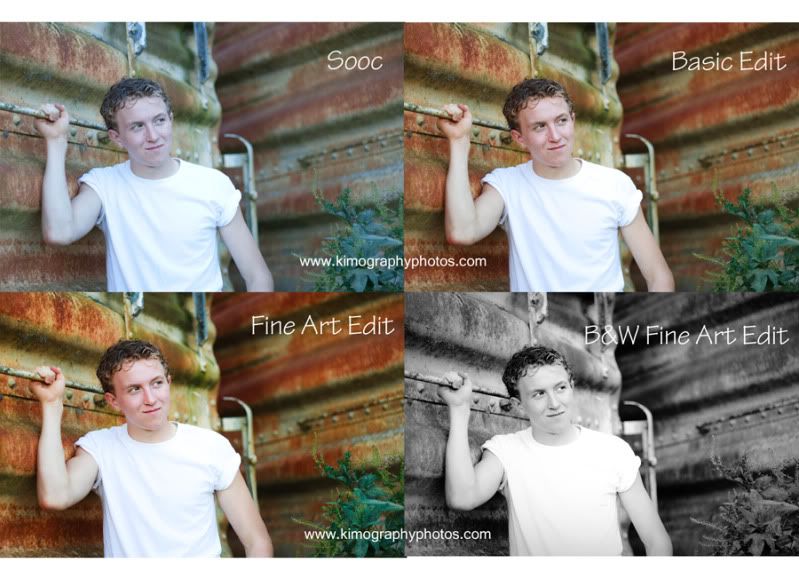
Each picture will get the following treatment...sharpened, color boost, contrast boost. This initial edit is referred to as a BASIC EDIT. This gives the image a nice pop to it and looks MUCH better than the straight out of the camera (SOOC) image.
Then I move on to the FINE ART EDIT. This is where most of my time is spent. This is what differentiates a professional photographer from any one else that can take your picture...in my opinion. (Not to mention the need of professional equipment and the need of Know How.)I spend time making sure the picture looks as good as it can. I know most photographers charge EXTRA MONEY for fine art edits. At the current time...I do not charge extra for this. I am enjoying the practice and learning more and more things and I like delivering my very best work whether or not you have paid for it specifically. Fine Art Edits include...applying photoshop actions to achieve different coloring affects, removing blemishes, smoothing out the skin, taking off a few pounds, adding a few pounds, head switches, removing distracting things from the image, enhancing facial features, etc.
Below I have a collage with examples of everything I have mentioned. I think it is always fun to see the progression of the editing process. Lots of time and love go in to each of my edits. I love making people feel beautiful and photogenic. These are pictures from a recent senior session. I will post more of this talented young man later this week!
Photobucket
SO for fun...can you tell the difference between the Basic and Fine Art Edit besides the smooth skin and color? Look closely. Please do tell!

Wednesday, September 15, 2010

Aperture

Several weeks ago, I was talking on the phone to one of my clients. She told me that her husband was really impressed with the portraits I had taken for them. He is a computer man himself, knows how to photoshop, and mentioned to his wife that I took the time to blur all of the edges of the portraits. :) Thank you by the way!

After I got off of the phone , I realized what she had told me and realized some of you might wonder HOW to get those beautiful blurred edges he was so impressed with. Honestly, Photoshop can't take any of the credit. :) Even though you can BLUR edges in photoshop, it is much much easier to buy a lense with a low f/stop and shoot wide open, creating a shallow depth of field therefore letting your lens do all of the work.

At one time I too wondered what differentiated a snapshot camera images with these professional images I was admiring. I studied and practiced and LOVE the effect APTERTURE can give a photo.

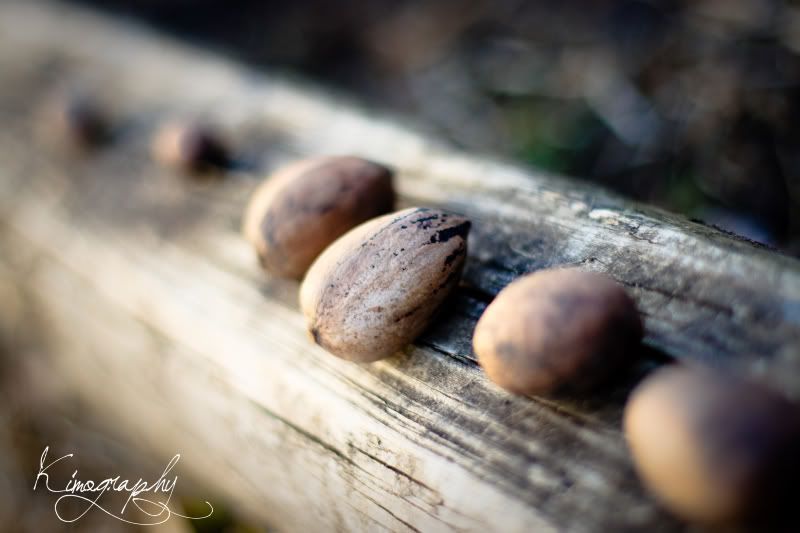
Okay , for example look at this picture below. I took this early this spring. My kiddos lined up nuts and I had to take a picture of it. This was picture was shot on a low f/stop (1.8) , creating a very shallow depth of field. With this shallow depth of field I am able to focus sharply on only a portion of an image with the outsides blurred. What do you think?

Photobucket

So, what is aperture exactly? Aperture, like everything else in a camera has to do with lighting...how much light is let in to your camera. By controlling the aperture (and shutterspeed and ISO) , I am able to let more or less light into my camera. For now we will just discuss aperture. View the chart below and keep in mind that my aperture setting for the image above was at f/1.8.

Photobucket

After looking at the chart, you should be able to tell that the lower the f/stop...the larger the opening.( f/1.4 is much larger than f/16).

Many of my clients have recently purchased their very own dSLR camera. The stock lens that comes with the camera usually has an f/stop range of about f/4.5 or f/5.6 and up. Additional, pricier lenses must be purchased to get the additional/lower f/stops.

Again...the lower the f/stop, the more shallow depth of field....this is referred to as shooting "wide open" because LOTS of light is able to come in to your camera creating this effect. I personally love the bokeh involved with a shallow depth of field. The bokeh is a fun name for the beautiful part of the images which is out of focus that can capture pretty light reflections.

Before I end, I wanted to mention one more thing about aperture and when I choose to shoot wide open with a lower f/stop or a wider aperture. Sometimes, I am inside a client's home dealing with low light situations...maybe an overcast day and hardly any sunlight. In this situation, I will crank down my f/stops to the lowest number possible...making the opening WIDE, trying to let in as much light as possible to achieve the correct exposure so that I don't have to use my flash...something I usually try to avoid. Now when I am outside with a family of five...my f/stops have to be at least set to f/5 so that all family members are in focus. In this case shooting WIDE OPEN is NOT the route I choose to go.

So , I want to encourage you all out there that have your own dSLR cameras to pull out your manuals that came with the camera, put that baby on a manual mode and see how to change your camera's f/stops.

I hope this wasn't too confusing! Let me know if you have any questions!

One day....in the future, I plan on hosting a photography workshop. I am still in the planning stages but would love to take out my clients that are interested and share what I know and have learned and help you all learn how to use you cameras! We'd spend a couple of hours just having fun with our cameras. Let me know if you are interested!

email me kim@kimographyphotos.com

Thursday, September 9, 2010

Family Picture

Photobucket

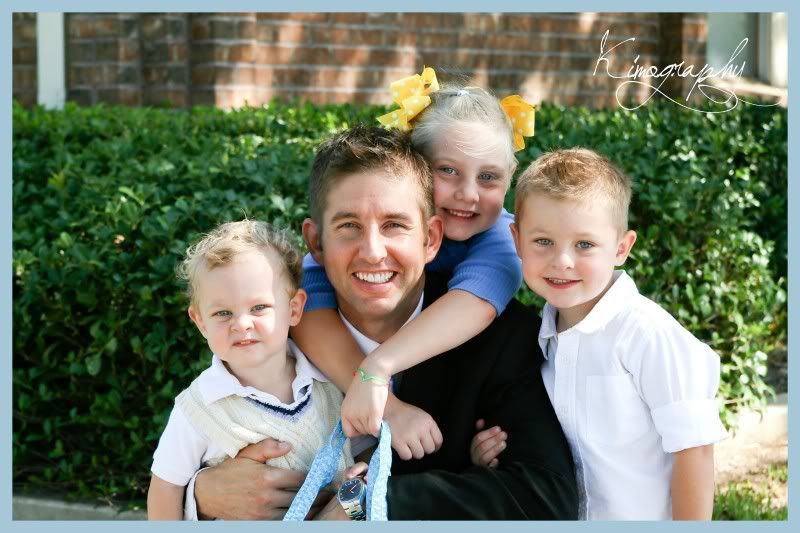
This is my husband and three little darlings. I consider this a pretty good picture for our family and a family with three different kids for that matter. Everyone is looking forward and smiling. My youngest isn't SMILING smiling like he normally does but I will take it. THIS is a picture that I will treasure for ever...the loves of my life.

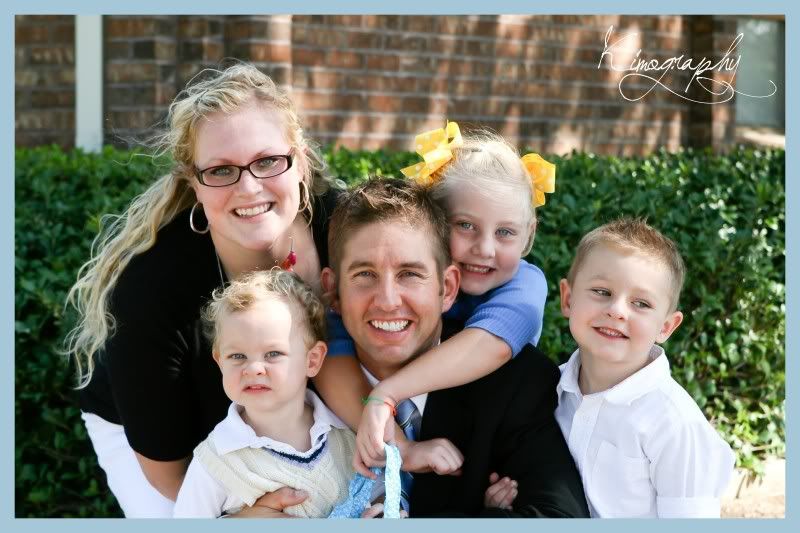
ANYWAY :) This picture was taken on Sunday afternoon. We had family in town and were outside the church building taking pictures of all of us. I wanted a picture of my husband and three kids. Right after I took this picture (above)...I handed my camera to my sister and asked her to take another picture and I would just squeeze in and make a Family picture out of it. This is what it looked like: (below)

Photobucket

Not TOO bad. I was happy to have a picture of all FIVE of us together...which doesn't happen all that much. My older son is looking away, but smiling. My youngest...well, he is in thought I guess. SO I posted this picture on my family blog and on Facebook for all to see. People enjoyed seeing my family picture and i was happy.
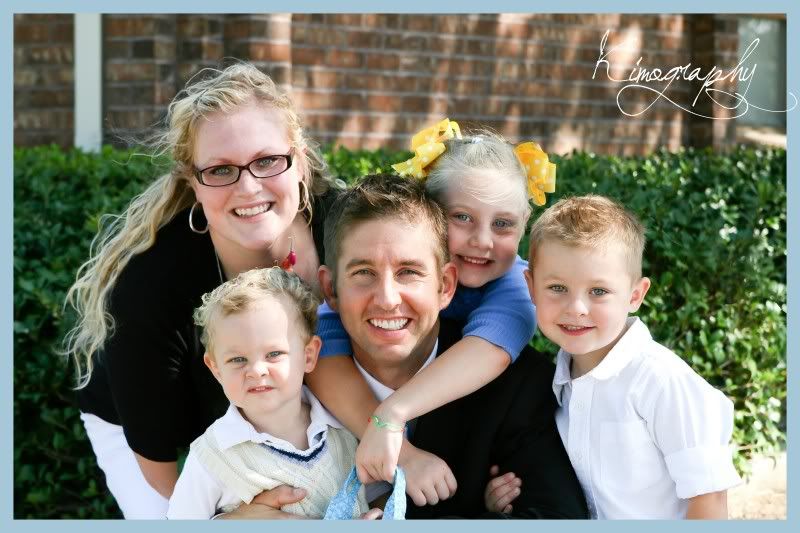
Well, the more I looked at it, I realized that the one picture of my husband and three kids was perfect of everyone except I wasn't in it. So, using PHOTOSHOP, I just put ME into the first picture so that I have combined the two pictures...YES...the best out of both worlds.
AND here is the NEW family picture that I wish to share with everyone. :)
Photobucket
Let me ask you a question...What do you think of the final picture? Can you tell? If I didn't show you all three pictures would you KNOW something was "up" with the final picture?
I am by no means a photoshop expert ... I have been learning new tools and tricks over the last year and a half and happy with my progress. I have lots to learn and practice makes perfect. After reading over this post, I can tell a small difference in the final picture but again I have sat and looked at it for a long while. Instead of fixing it...I will leave it and let you see for yourself.

Tuesday, March 30, 2010

Black & White VS. Color

I am trying out a new look to my BLOG. I love the look of larger images, however, it will add some processing time to my work flow and I am not quite able to commit just yet. So here is for a trial run.

After I do a session, I download all the images onto my computer. After marking my favorites I go thru my images and see what they look like in black and white. I am surprised that some images look WONDERFUL in black and white. I personally love the timeless, classic feel that b&W can give to an image. And some images don't look good in black and white at all. Of course this is all relative. It will vary from person to person and this is just my personal opinion.

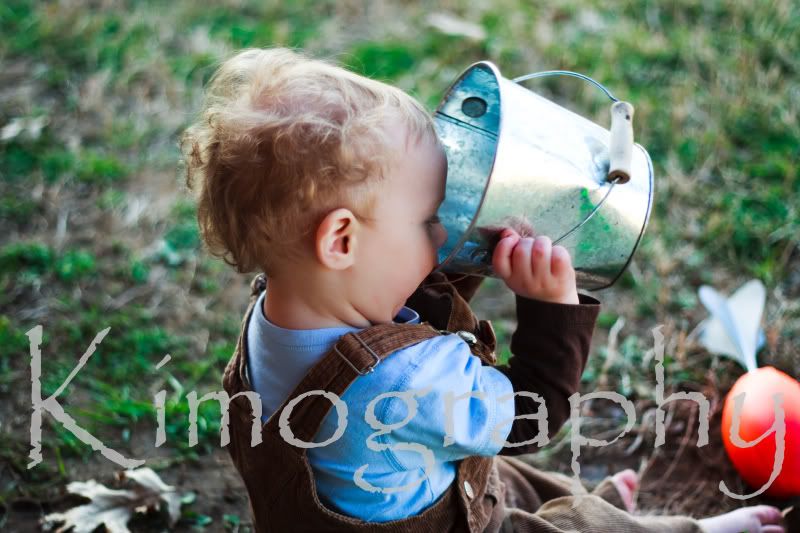
I have taken this photo down below for instance...in color first. Cute isn't it. I like the brown and blues...the orange football off to the side.

Photobucket

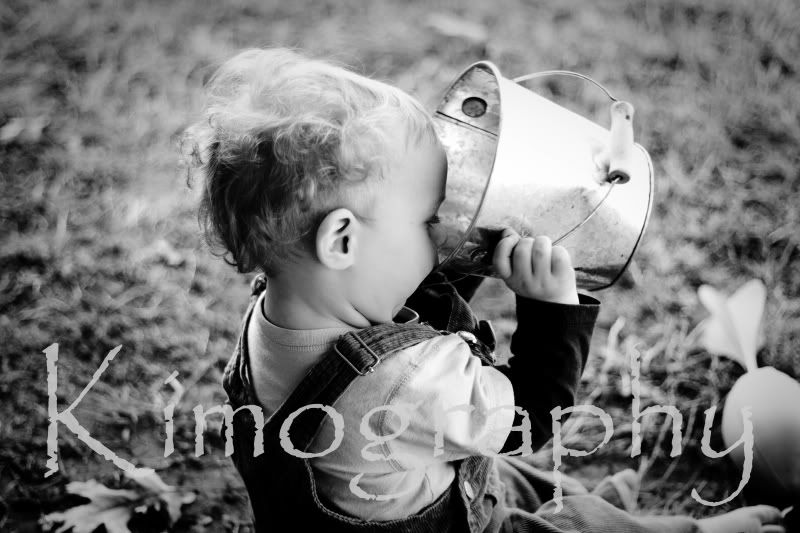
But I REALLY liked this in B&W for some reason. I have noticed that I really like my kandids in black and white for that classy feel. :)

Photobucket
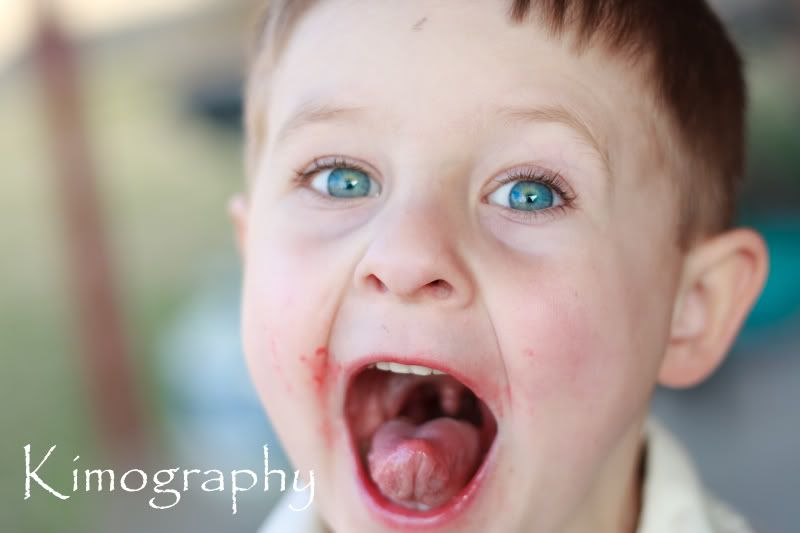
Another wonderful things is.....A photo like this.....

Photobucket

Doesn't look quite so scary in black & white...a face my four year old likes to pull often!

Photobucket
So play around with it. Enjoy. Experiment. You'll like what you find :)

Wednesday, March 17, 2010

Infant Photography 101

What I learned today:

So lets say you have a baby that is doing this...instead of smiling and cooing like mom wants. First thing you, as the photographer, can do is relax. Enjoy taking pictures of the moments like these. Who doesn't want to remember their child like this? This little sad face is too cute to pass up!


Insist that the baby gets what she needs. This baby was sooo tired and really enjoyed sucking on her pacifier. Her eyes were very very heavy. She needed her rest! It is hard to be a model you know. :)


Go ahead and let her fall asleep. Take cute pictures of her and move her into positions like this when she is so tired she'll never know what happened to her. She won't be able to arch her back or pull off her head band. :)Let her sleep for about 10 minutes. And then....


...take off her clothes and pretend you aren't going to take pictures of her anymore...(the big black camera can be a distraction). Let mom come in to sight and it is like magic. She'll give you exactly what you wanted in the first place. A sweet, sweet smile an hour and a half later! Lol!

Thank you MAC! You were adorable as ever today! More pictures coming soon!
Posted by Picasa

Saturday, March 6, 2010

Behind the Scenes

Since I am showing you pictures of my own child, I thought it would be fun to share a little behind the scenes tidbit with you also. Do you ever wonder what a picture looks like before I edit it? Down below is the "straight out of the camera" or SOOC image. I have done absolutely nothing to that image...except add 'sooc' and a blue border but hopefully you get the right idea. In my opinion the image doesn't look bad...I like the blue eyes, the blue shirt, its completely in focus and sharp and that smile is award winning if you ask me. :) BUT, I know it could look just a little bit better.

ISO 100 , f 1.8 , 1/250, 50mm

This is the edited, Kimography version. I have saturated the color a bit, smoothed out his skin, warmed the skin tones of the photo just a tad, and slightly boosted the contrast. Because I am his mother and like it this way, I left the food on his face rather than removing it. I believe it adds character and wasn't too distracting. I edit almost all of my photos this way. I love keeping them looking natural...with just a little boost. Hopefully when you look at my work, it doesn't SCREAM "PHOTOSHOP." Something more subtle....for instance...."woah , what a great picture." :)
Posted by Picasa